It’s Friday afternoon. You’ve just finished a long week of service calls, installations, and unexpected site visits. You’re back at the office (or more likely, sitting in your truck) trying to remember exactly what that leak looked like before you fixed it on Tuesday.
You scroll through your phone’s camera roll. You see photos of your kids, a screenshot of a funny meme, three blurry pictures of a furnace, and a video of your dog. Somewhere in there is the proof you need to show the customer why that extra part was necessary.
By the time you find the photos, crop them, and try to email them over, thirty minutes have passed. And that’s just for one job.
This is the reality for thousands of tradespeople. We know we need to document our work, but the tools available are either a disorganized mess of phone folders or a "bloated" piece of contractor software that costs $300 a month and requires a degree in computer science to operate.
At JobLuma, we believe there’s a better way. You don’t need a massive enterprise system to look professional. You just need a simple, effective way to log your work and share it. Here is how you can create professional photo timelines in just 5 minutes.
The Trap of "Big Software" for Small Contractors
If you’ve spent any time looking for a contractor job app, you’ve probably run into the "Goliaths" of the industry. These are massive platforms built for companies with 50+ trucks and a dedicated IT department. They promise to manage your inventory, your payroll, your GPS tracking, and your grandma's birthday.
But for a solo operator or a small team of five, these platforms often do more harm than good. They are:
- Too Complex: You have to click through six menus just to upload one photo.
- Too Expensive: You’re paying for a hundred features you will never use.
- Too Slow: They are "desktop-first" programs that have been clunkily ported to mobile.
When you’re in the field, you don’t have time to navigate a complex dashboard. You need a photo timeline app that works as fast as you do.

Why Photo Documentation is Your Best Insurance Policy
Before we dive into the "how," let's talk about the "why." Why should you even bother with a before and after photo app?
1. Liability Protection
According to industry research, photo documentation is one of the strongest defenses against liability and disputes. If a customer claims you scratched their floor or installed a part incorrectly, a time-stamped "before" photo is your best friend. It creates an indisputable record of the site's condition before you ever touched a tool.
2. Building Immediate Trust
Customers can’t always see what you see. If you’re a plumber working in a crawlspace or an HVAC tech on a roof, the customer is taking your word for it. When you send them a professional timeline showing exactly what was broken and how you fixed it, trust is built instantly. They aren't just paying for a repair; they are paying for the peace of mind that the job was done right.
3. Faster Payments
It’s a simple fact: informed customers pay faster. When an invoice arrives alongside a visual project timeline, there are fewer questions and fewer delays. You’ve provided the proof of work up front.
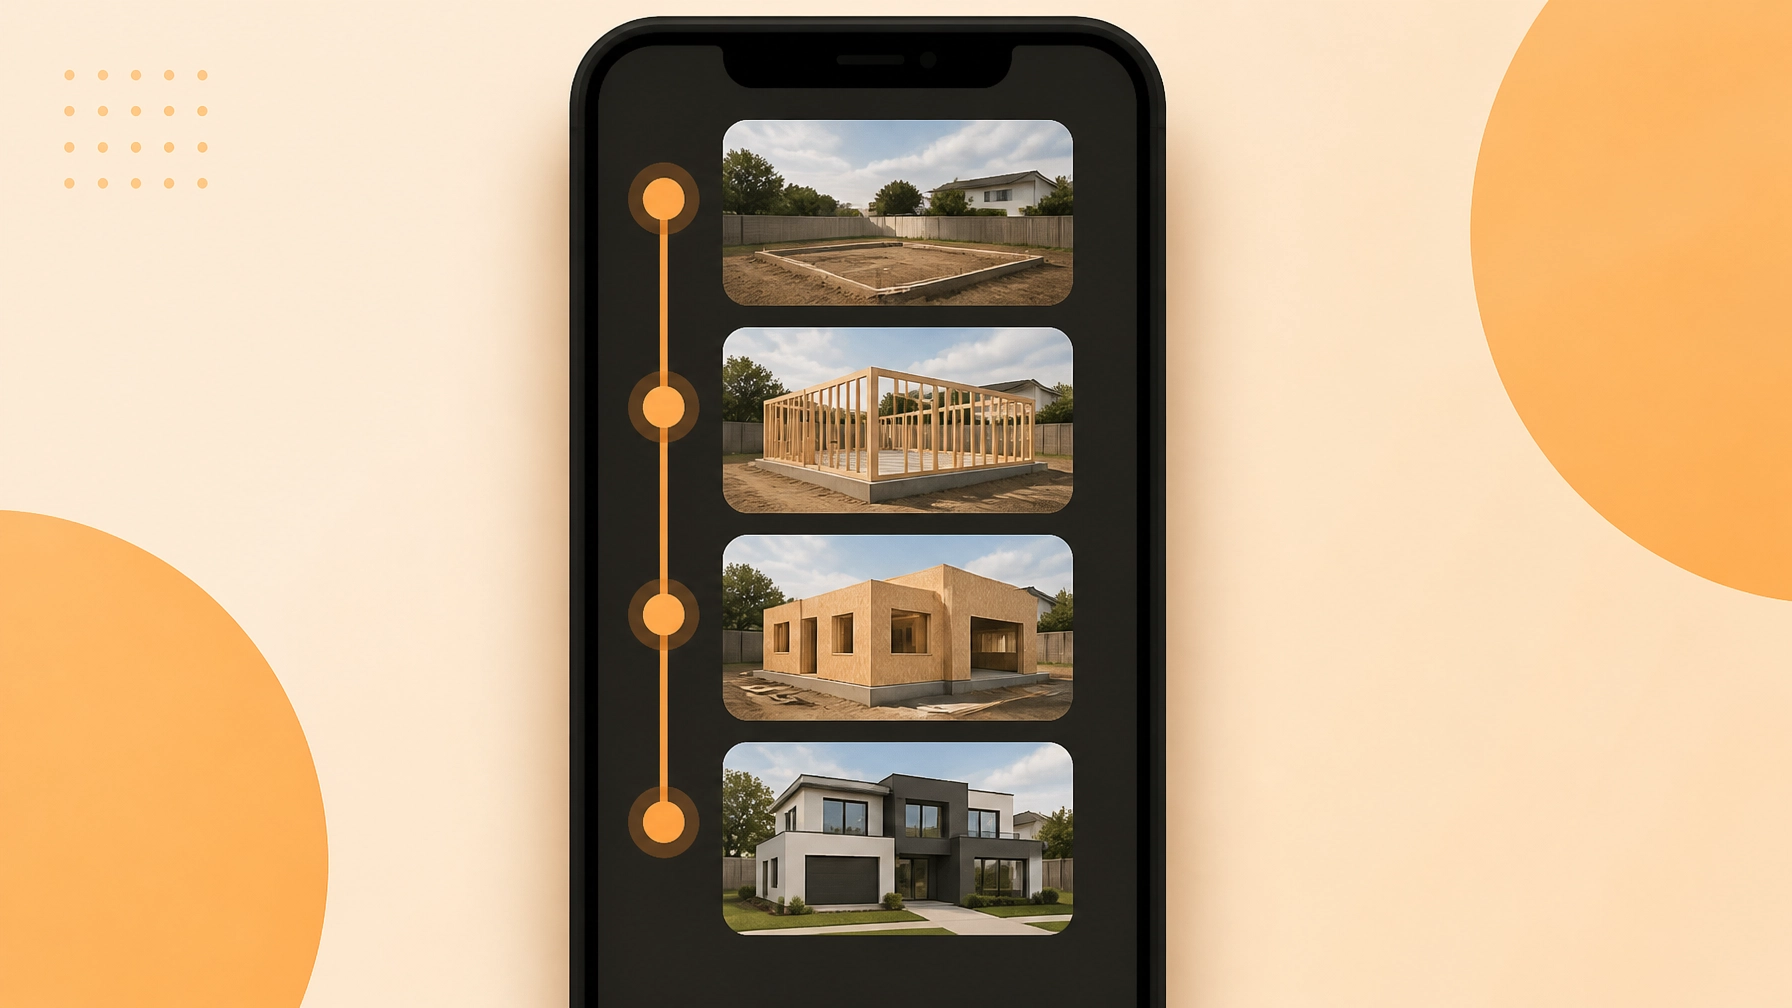
The 5-Minute JobLuma Workflow
We designed JobLuma to be the simplest construction photo documentation tool on the market. We stripped away the bloat and focused on the three things that actually matter: logging photos, adding notes, and sharing them with the customer.
Here is the exact 5-minute workflow our most successful contractors use:
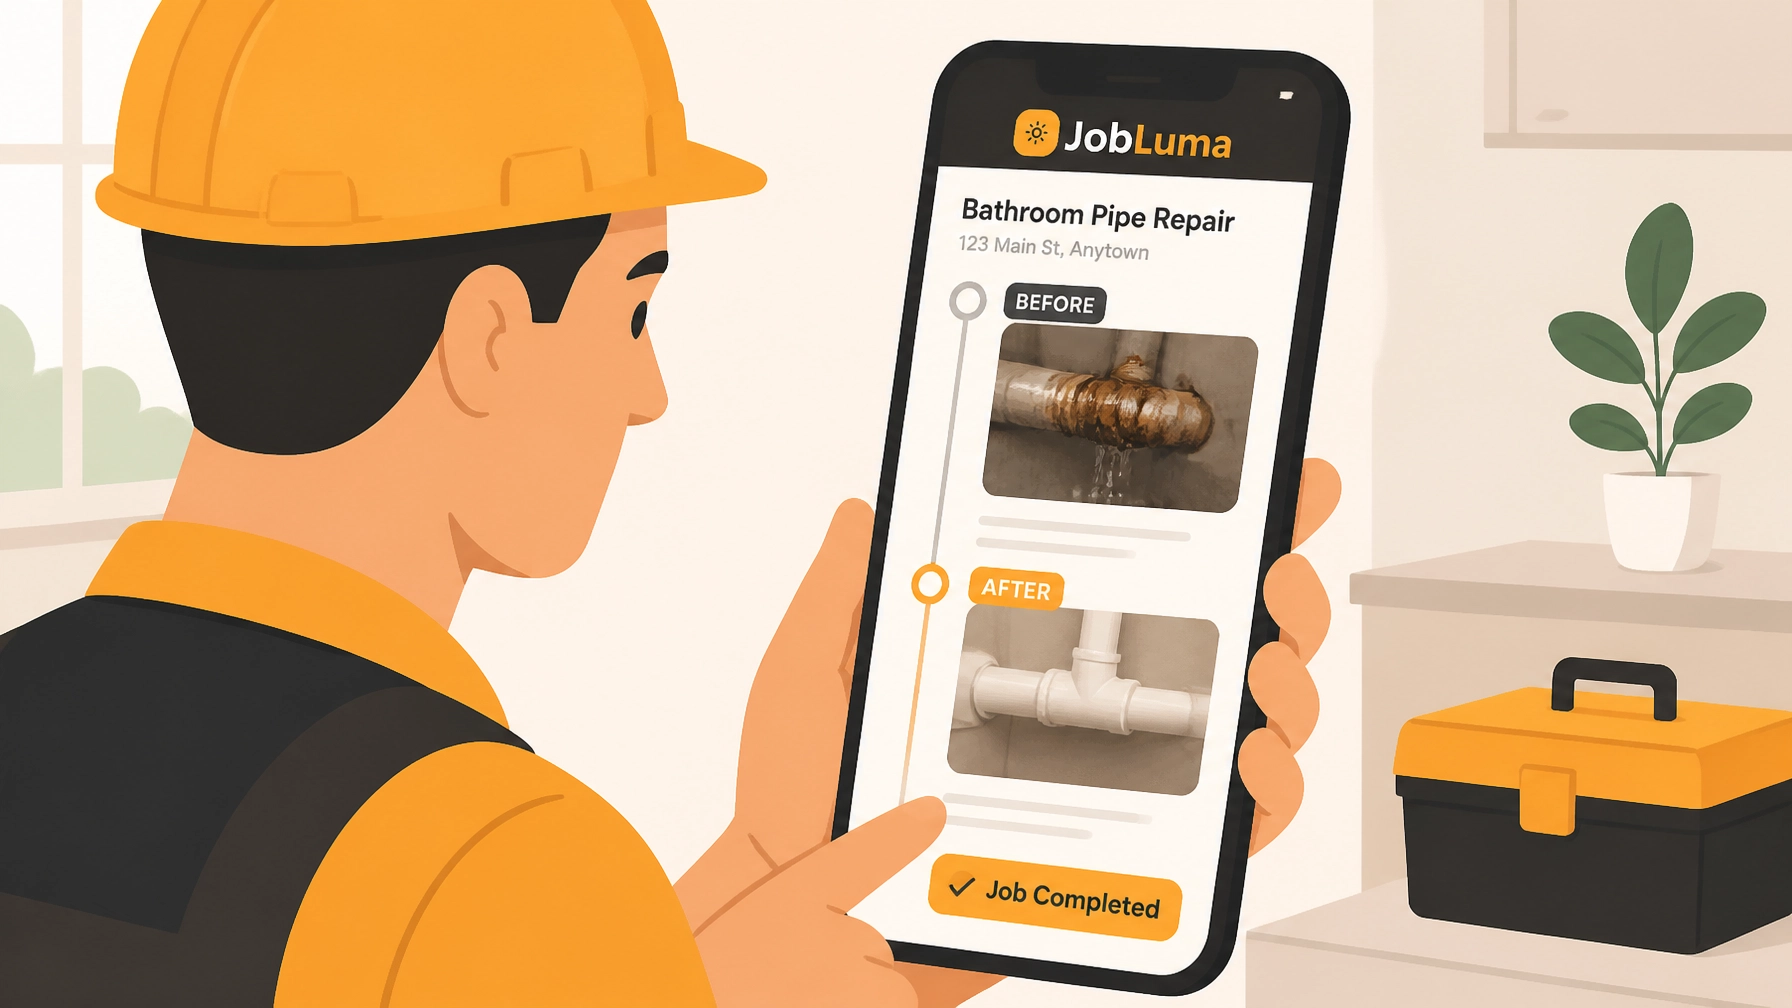
Step 1: The "Before" Snap (1 Minute)
As soon as you walk onto the job site, open JobLuma and create a new job. Take two quick "before" photos. One wide shot for context, and one close-up of the specific issue.
Step 2: The "In-Progress" Note (2 Minutes)
As you work, if you find something unexpected: like a hidden leak or frayed wiring: snap a photo and add a quick voice-to-text note. This isn't just for the customer; it’s for your own records. If you ever have to come back to this job in six months, you’ll know exactly what you found.
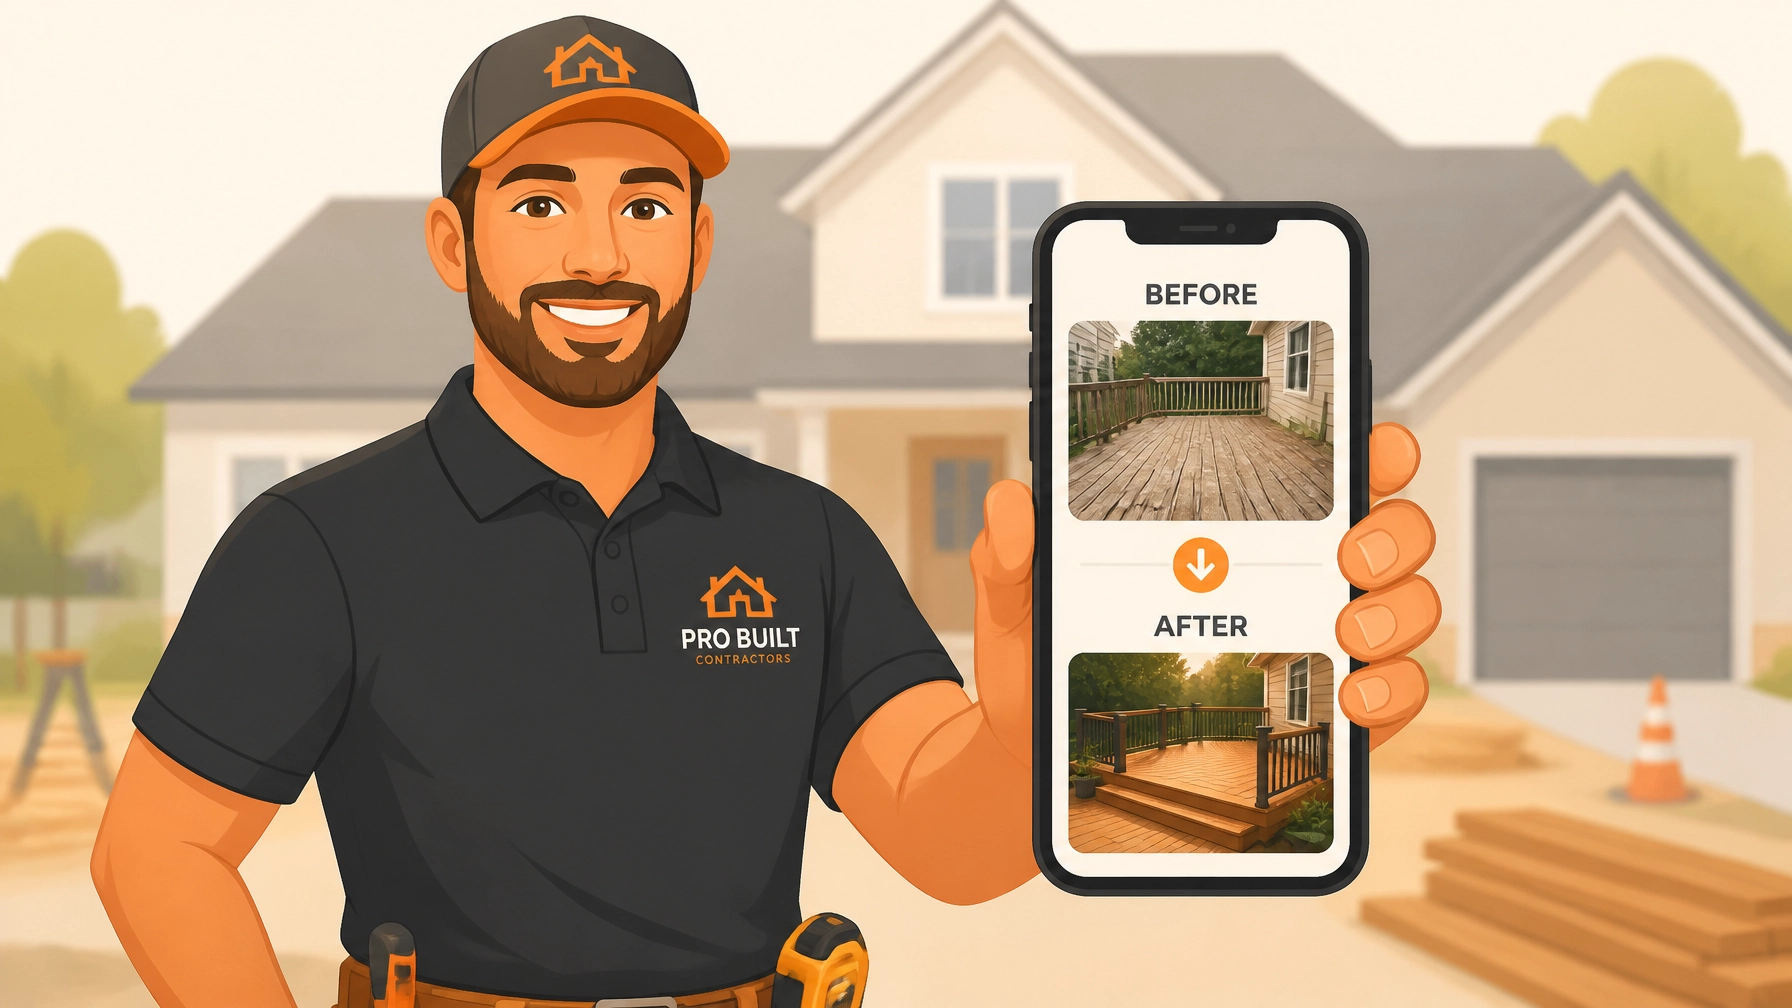
Step 3: The "After" Shot (1 Minute)
Once the work is complete and the site is cleaned up, take your final "after" photos. Try to take them from the same angle as your "before" shots. The visual contrast is a powerful way to demonstrate the value of your labor.
Step 4: One-Click Share (1 Minute)
This is where the magic happens. In JobLuma, you don’t have to "generate a report." You simply hit "Share." JobLuma creates a clean, branded timeline that you can text or email directly to the customer.

The "No-App" Customer Experience
One of the biggest hurdles with other contractor photo apps is that they require the customer to download an app or create an account just to see their photos.
Let’s be real: your customers don’t want to download another app.
They want to see their photos and get on with their day. With JobLuma, the customer receives a simple link. They click it, and it opens a beautiful, mobile-optimized timeline in their phone's browser. It has your company logo, your notes, and your photos. It makes you look like a Fortune 500 company, even if you’re a one-man shop.
Turning Timelines into Marketing Gold
Beyond just documenting the work, these timelines are incredible marketing assets.
Imagine you’re an electrician who just finished a complex panel upgrade. You have a beautiful before-and-after timeline of the project. With the customer's permission, you can now:
- Share the link on your Facebook page to show off your craftsmanship.
- Link to the timeline in your Google Business Profile to build social proof.
- Use the photos for your website gallery.
Instead of generic stock photos of people pointing at blueprints, you have real, authentic proof of the work you do every day. This is how you win more jobs without spending a dime on ads.
Is Simple Right for You?
We know that some companies need the complex features of enterprise software. If you have 50 employees and need to manage a warehouse of 10,000 SKUs, JobLuma might not be for you.
But if you are a:
- Plumber who wants to document pipe repairs.
- HVAC Technician who needs to show a cracked heat exchanger.
- Electrician documenting a new circuit installation.
- Handyman who wants to prove the quality of a deck repair.
Then you don't need bloat. You need speed. You need a contractor software solution that gets out of your way so you can get back to work.
Start Your First Timeline Today
Stop losing your photos in your camera roll and start building a professional legacy for your business. You can sign up for JobLuma and have your first job logged in less time than it took to read this article.
Check out our features to see how we make field work easier, or jump right into our pricing to find the plan that fits your business.
Professionalism doesn't have to be complicated. It just has to be consistent.

Ready to transform your business? Sign up for JobLuma today and start creating professional timelines in minutes.